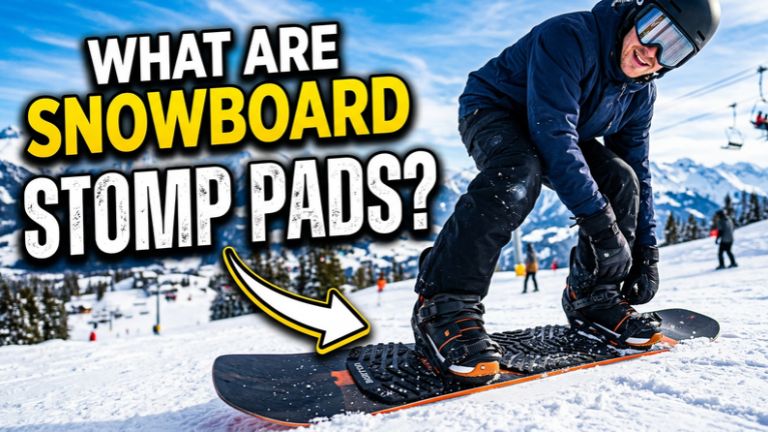
If you have ever stood at the top of a chairlift ramp with one foot unstrapped and a board that feels like a bar of soap, you already understand the problem. So what are snowboard stomp pads, and do you really need one? This guide explains what they do, where to put them, how they compare, and whether they are worth the money.
Short Answer: A snowboard stomp pad is a grippy foam, rubber, or studded mat stuck to the top sheet of a snowboard, between the bindings.
Primary Purpose: It gives your back foot traction when you ride with one foot unstrapped. This matters most when you get off chairlifts, skate across flat terrain, or do one-footed tricks.
Installation Quick-Rule: Place the stomp pad on the top sheet directly next to the inside of your rear binding.
What Do Snowboard Stomp Pads Do?
A stomp pad does three jobs. Each one makes your day on the mountain a little easier.
Traction When One-Footed
Top sheets are often smooth and slick, and snow makes them slicker. When you step off a chairlift, your back foot rests on the board. Without grip, it can slide off. A stomp pad gives your boot something to hold onto. It also helps when you skate across flat sections or push through a lift line.
Clearing Snow from Boots
Raised rubber ridges or metal studs also work like a scraper. Before you strap in, you can stomp your boot on the pad to knock off packed snow and ice. Clean soles sit flatter in the binding and hold better. This small habit can make strapping in faster and more secure.
One-Footed Control
A stomp pad helps with steering when your back foot is free. Riders use it during one-footers and gentle pressure turns on cat tracks. The pad lets you press your boot firmly against the board without slipping.
Are Snowboard Stomp Pads Necessary?
It depends on your skill level and your board.
For Beginners
Highly recommended. Beginners struggle most with chairlift dismounts, and a slippery top sheet causes many of the classic falls at the unload zone. A stomp pad adds confidence while you learn to balance on one foot.
For Experienced Riders
Optional. Some riders skip them entirely. Whether you need one depends on your riding style and your top sheet. Matte or textured top sheets can offer some built-in grip. Glossy top sheets are very slick, and a pad helps more on those.
Alternative Options
You do have other choices:
- Built-in top sheet traction: Some boards have textured areas.
- Stud configurations: Individual studs give targeted grip without covering much space.
- Heelcup technique: Some riders press the back boot against the rear binding heelcup instead of using a pad.
These options work, but they usually offer less grip than a dedicated pad, especially in wet conditions.
Where to Put a Stomp Pad on a Snowboard
Placement matters. A pad in the wrong spot is hard to use and may peel faster.
The Ideal Location
Put the pad right next to the inside edge of your rear binding. That is where your unstrapped boot naturally rests when you coast to the lift.
Alignment
Center the pad between the toe and heel edges. Some riders shift it slightly toward the heel edge, which suits a natural weight position. Test the spot by placing your boot on the board before you stick anything down.
Proper Installation Process (Preventing Peeling)
Follow these steps to help the pad stick.
- Clean the top sheet thoroughly with isopropyl alcohol. Remove dirt, wax, and moisture.
- Warm the deck and the adhesive with a hair dryer. Warmth helps the adhesive bond.
- Press firmly and evenly across the pad for 60 seconds.
- Let it cure at room temperature for 24 hours before heading to the mountain.
Skipping the cure time is the most common reason a new pad peels on the first day.
Are Snowboard Stomp Pads Worth It?
For most riders, yes.
Low Investment, High Confidence
Stomp pads usually cost between $10 and $25. That makes them one of the cheapest upgrades you can buy. The extra confidence on chairlifts can be worth much more than the price.
Durability
Quality pads with strong adhesive, such as 3M-backed designs, often last multiple seasons without peeling or losing grip. Cheaper pads may wear out faster or lift at the edges. Check reviews for cold-weather performance before you buy.
Style Options
You can choose from rubber mats, foam traction pads, and individual metal studs, sometimes called crab grabs. Each has its own look and feel, which is covered in the table below.
Different Stomp Pad Types
Here is how the main types compare.
| Stomp Pad Type | Material | Grip Level | Aesthetics | Best For |
|---|---|---|---|---|
| Rubber / Silicone Mat | Molded rubber | High | Traditional | All-around resort riding and snow scraping |
| Foam / EVA (Deck Pad) | High-density foam | Very High (squishy) | Skate-inspired | Freestyle riders and park laps |
| Metal Studs / Spikes | Aluminum / zinc | Extreme | Minimalist, discreet | Slick, icy conditions and glossy top sheets |
If you want an all-purpose option, a rubber mat is a safe pick. If you ride park, a foam pad has a comfortable, skate-style feel. If you ride icy resorts or have a glossy board, studs bite hardest, though they can scuff boots and gear.
Common Stomp Pad Mistakes to Avoid
A few simple errors cause most stomp pad problems.
- Sticking it on a wet or waxed surface. Wax and water stop the adhesive from bonding. Always clean with isopropyl alcohol first.
- Placing it too close to the binding. If the pad touches the binding, it can interfere with movement and peel at the edge.
- Skipping the cure time. Riding right away lets snow and moisture work under the edges. Wait the full 24 hours.
- Picking a pad that is too small. If your boot hangs off the edge, you lose grip. Match the pad size to your boot size.
- Using studs on a board you want to keep pristine. Metal studs can scratch the top sheet and nearby gear if they shift.
Final Thoughts
So, what are snowboard stomp pads? They are simple grip pads that make one-footed moments safer and easier. They help most when you get off lifts, skate across flats, or want better control with your back foot free.
For $10 to $25, a well-placed, well-installed pad is a low-cost upgrade. Pick a type that fits your style, follow the install steps, and give the adhesive time to cure.
Ready to add traction to your top sheet? Explore our top-rated picks in our complete buyer’s guide to the best snowboard stomp pads.
Frequently Asked Questions
Can you remove a stomp pad without ruining the snowboard?
Yes. Use a hair dryer to soften the adhesive, then peel the pad off slowly. Clean any leftover residue with Goo Gone or rubbing alcohol.
Do stomp pads ruin your snowboard graphics?
No. Clear stomp pads or individual studs let the graphics show through cleanly.
Can you put a stomp pad on a rented snowboard?
Avoid stick-on pads on rental gear unless the shop approves. Permanent adhesives are difficult to remove between renters.